Apple iPad support
The edgertronic camera wasn't designed to be controlled with a tablet or phone. Since standard protocols are supported by the edgertronic camera, it turns out using an iPad works quite well. If more customers express an interest in better usability using an iPad, we will enhance the camera's capabilities. The edgertronic camera does not work with an iPhone.
iPad communication with camera
An iPad supports wireless connectivity and the edgertronic has a wired Ethernet jack. You have three options for connecting the devices together:
- Connect the camera to network that supports a Wireless Access Point
- Use a simple wireless travel router
- Use a lightening to Ethernet adapter - verified to work
- Use a USB-C to Ethernet adapter - verified to work
Web user interface
Once connected to the camera, use the Chrome browser on your iPad to browse to the camera. You will notice a few differences in how the user interface works:
- You get a warning message to use the Chrome browser even though your are using a Chrome browser.
- Most buttons need to be pressed twice. The first time brings up the bubble help. The second press activates the button.
- You can not move the button or status boxes around the screen (at least I couldn't figure out how to do it).
- You can play the last saved video, but you have to use a different application to download the videos to the iPad.
Downloading videos to an iPad
The edgertronic camera supports the webDAV file transfer protocol. You can use an application like FE File Explorer Pro that supports webDAV. The webDAV URI to use is
http://10.11.12.13/videos
of course substitute the correct IP address of your camera in place of 10.11.12.13.
FE File Explorer Pro
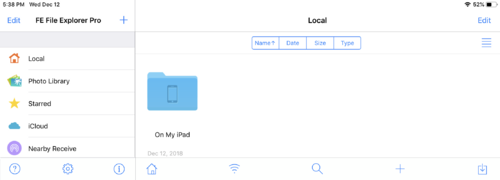
Here are a few screenshots from when I downloaded a video using FE File Explorer Pro.
Launch the application.
| Choose plus sign (+) to establish a new connection. |
| Select webDAV connection and fill in the connection details. |
| Display Name and Host URL' is the only fields you need to enter. The URL starts with http:// followed by the camera IP address, followed by /videos. In my case, I configured my DHCP server to always give the camera the DNS name sc1e, so I used the name instead of the address. If you have lots of cameras, they are easier to keep track of using names instead of numbers - just like kids.
Then click on the connection named Edgertronic. |
| You can view the camera log, videos saved to a network share if you have configured CIFS, or videos saved to the SD card or USB storage device.
I selected sdcard then DCIM to see the list of captured videos and metadata files stored on the big SD card in the edgertronic camera. |
| Click on the three vertical dots to the left of the file you want to download to bring up the file options modal. |
| Select the Copy to file option. |
| You can select Local to download the file from the camera to the iPad |


